Showing posts with label scenario. Show all posts

Tuesday, September 2, 2014

Worst Case Scenario #12: 'Condor Down! Condor Down!' - Stuka Crash-Site Recovery, Bilbao 1937


On the night of the 6th of August 1936, a nondescript freighter from Hamburg quietly slipped into Cadiz harbour. Secretly packed within the ship's hold was the first prototype of a new weapon, an experimental aircraft to be tested by the Condor Legion in Spain, the very first Ju 87 'Stuka' dive bomber which  later was to become the icon of the dreaded Blitzkrieg.


The Stuka prototype was piloted by Unteroffizier Herman Beurer, who, after conducting a series of non-combat flight trials, took part in the Nationalist campaign against Bilbao in June 1937. No account survives today which describes Beurer's operations, but it's presumed that his Stuka finished its tour, was quietly crated back to Germany and modifications were made to later models based on his combat experiences.

In Anthony Beevor's 'The Battle for Spain' the author mentions that the head of the Condor Legion's Luftwaffe, Wolfram von Richthoffen (cousin to the famous Manfred), was so concerned about having any of the Stukas shot down that he assigned inordinately heavy ME109 fighter-support to help protect them.   


So from this information my mind began to churn and I came up with a hypothetical 'Chain of Command' scenario. In it, Beurer and his prototype Stuka, much to the horror of von Richthoffen, have been forced down behind Republican lines and both sides are frantic to recover both the aircrew and the wreckage of the prototype.


The scenario is essentially a race against time for both sides. The Nationalists want to retrieve the aircrew and destroy the Stuka before the Republicans can secure them for their obvious propaganda and technical value. The Republicans, in turn, want to capture the aircrew for interrogation and they also wish to film the crashed Stuka in order to display it to the world press (and we can assume that more than a few Soviet commissars would be very interested in the prototype's design).

Scenario Details


The Nationalists

Beurer and his rear gunner, Willi, have pulled themselves from the wreckage along with some supplies. Nonetheless, before they can attempt to destroy their aircraft they hear a vehicle approaching from the Republican lines. Spooked, the two airmen manage to dash to cover where they lay concealed awaiting an opportunity to escape to their own lines.

The German aircrew are kept off-board and their possible locations (four sites) are marked on the tabletop for all to see. If the Republicans close to within 4" of any of the marked locations it is revealed whether the aircrew are there or not. 

The aircrew are armed with a MG34 taken from the Stuka. Due to them only being able to recover a few drums of ammunition from the Stuka, the MG34 will run out of ammunition when more 1's than 6's are rolled in a burst.

The Nationalist rescue force starts off-board, but will have initiative at the game's start. They consist of:

- The force commander with an attached 50mm Light Mortar team.

- One section of Moroccan Regulares armed with rifles. They also have a LMG team and a Tank Hunter team. They are considered Veteran troops and are Aggressive.

- One section of Guardia Civil armed with a mix of rifles and SMGs. They also have a LMG team. They are considered Green troops

- One section of Carlist Requites armed with rifles. They also have a LMG team. While they are considered Regular troops they also carry a reliquary cross giving them bonuses in close assaults and moral tests (they have to call out 'Viva Christo Rey!'). Also, if they are within 10" of the Moroccans they have to test whether they take a few pot-shots at them (their Catholic sensibilities being offended by the presence of Muslims on Spanish soil).

- An Italian CV33 Tankette (just 'cause I love the look of the little guy)

- Finally, but perhaps most importantly, a Panzer I with a Luftwaffe air observer in the turret.

These can come in from each of the two Jump-Off points in any order that the Nationalist players desires. The vehicles have to enter from the short edge.


The Republicans

The game begins with the Stuka crash-site being approached by a squad of Assault Guards mounted in an armoured truck. They are Veteran troops armed with rifles. They also have a Tank Hunter team (SMG and dynamite) and are considered Aggressive.

The rest of the Republican force is as follows:

-The force commander with an attached 50mm Light Mortar team.

- One section of Bilbao Civil Guard. They will have a LMG team and a Tank Hunter team. They are considered Green.

- One section of International Brigade infantry. They have a LMG team and a Tank Hunter team. They are considered as Regulars.

- A Hispano Suiza towing a Bofors anti-tank gun. Regulars.

- A press film crew from Bilbao.

As mentioned previously only the Assault Guard section is on the table at the start of the game. The rest of the Republicans will enter piecemeal. At the start of each Republican phase each component 'section' needs to roll a '6' to be able to enter the table.


The Friction

Every phase a die is rolled. If it is a '1' or '2' a flight of ME109s are sighted coming in for a strafing attack. This attack will happen at the end of the next phase (meaning that usually both sides will have a chance to take cover with some of their units before the strafing attack begins, if they desire).


The ME109 strafing is random as the fighter pilots are in a panic to deny anyone access to the crash-site (being humiliated in allowing the Stuka to be shot down in the first place). Re-roll the target randomization if the PzI is initially selected as the pilots should be aware of its silhouette and air-recognition markings. The ME109 strafing is an 8 dice HMG attack with an AT of 1 (but always hitting the top armour). 


When the Pz I enters the battlefield with the air observer they will discover that, due to atmospheric conditions (or whatever), they cannot raise the Luftwaffe on their wireless set to direct their attacks. Instead, the air observer will have to splice into the telephone line crossing the table to establish a 'land line' to gain control of the Luftwaffe attacks. This will take one phase where the Pz I is activated next to one of the phone poles. Once communication is established the air observer will be able to call in air support from his position.


The PzI rushing up to link into the phone lines while the Nationalist infantry begins their assault.
Finally, a Film Crew is being rushed to the crash site to film the wreckage for newsreels around the world. Unlike the other Republican Reinforcements they do not roll to arrive on each Activation Phase but instead will come onto the scene on Turn 2.

Once the film crew arrives they will need time to set up their equipment. This is reflected in them accumulating 12 points. Each time the film crew is activated in a Phase (they are a Team) they roll a D6 and accrue that many points. 


Our Game

Our game began with the Stuka aircrew dashing into the walled field to hide while the newly arrived Assault Guards cautiously advanced down the riverbed towards the stone hermitage on the other flank. Meanwhile, the nationalists entered the battlefield with both the Moroccans and Carlists sections (initially kept apart a safe distance) while being supported by the Panzer I which picked its way through the woods. 

The Nationalist command conferring to organize their advance.
The ME109 strafing attacks were felt quite early with some Moroccans becoming casualties to their 'blue-on-blue' fire. Spurred to action, the Luftwaffe observer ordered the Panzer I driver to take them to the phone lines as fast as possible to stem the uncoordinated air attacks. (The Pz I never did tie into the phone lines as the Nationalist players always had something better to do with their command dice - or so they thought...)

The situation at half-time.
As the game progressed the rest of the Republicans infantry managed to make it onto the battlefield with the International Brigade fighters and Bilbao's Civil Guard taking long-range pot shots at the Moroccans and Carlists from their positions along the riverbed. On the other flank, the Assault Guards discovered that the Stuka aircrew was not hiding in the Hermitage and so began to shift their search towards the small church. 


The Civil Guard dishing it out and taking it.
The Republicans managed to 'fill up' their Chain of Command dice first and moved the game to Turn 2, allowing them to bring in the film crew. Nonetheless, the Nationalists responded to this up by retaining the initiative over the next two Phases moving up, and throwing in, the Guardia Civil and Carlists against the Assault Guards who were moving through the cornfield. 

The Guardia Civil and Carlists move forward to attack the Assault Guards (seen just right of the cornfield).
The close assaults were bloody with the Guardia first being thrown back in disarray by the Asaltos. Undeterred, the subsequent Carlist attack, led at the front by their reliquary standard bearer, screaming 'Viva Christo Rey!', forced the Assault Guards back with heavy casualties being suffered on both sides. 


'Viva Christo Rey!'
Two critical events happened at this point. First, the Moroccan Regulares met up with the German aircrew in the walled field, rescuing them from immediate capture. The second was that the Film Crew had arrived onboard and were beginning to set up their equipment behind the protection of the armoured truck in order to film the wreckage of the Stuka. 


The Film Crew setting up for their newsreel...
In the last few phases of the game the Moroccans and Luftwaffe aircrew advanced to the edge of the field and managed to catch the International Brigade troops in the flank with withering fire to which they were forced to fall back to the riverbed near the crash site.


The Moroccans and aircrew fall back firing...
...taking the International Brigade troops with enfilading fire.
As the film crew were masked by the armoured truck and supported by both the Civil Guard and the fighters from the International Brigade, the understrength Nationalists tried to drop mortar rounds on the truck, but to no avail. 

It was at this point that the Nationalist players realized that if they had access to the ME109s circling above the battleground they could have had them attacking the Stuka crash site. Oops! A mistake to be sure, but we all know how games can give us tunnel vision when we have the bit between the teeth...

So with darkness falling the Condor Legion will have to be content with the recovery of their aircrew, while suffering the humiliation of seeing their new secret weapon filmed for all the world to see - von Richthofen will be furious. All in all, a Republican victory.

It was a great game and I wish to thank all the guys for making it such a fun night. I have to mention that two of our young players, Conn and Aiden (sp), where initially just supposed to be stopping by to drop off spectacles for Conn's father, Sean, and take a brief look at the table before going out to chase girls. Well, I'm quite chuffed to say that the game managed to draw them away from their prurient pursuits for the entire evening. They looked a little chagrinned at midnight when they realized that they had missed their party, with their girlfriends texting them, wondering where they ended up. To me that's as good a compliment as I can expect for any game!

Next up: A few new additions for the Pulp Adventure collection.

Friday, September 27, 2013

Worst Case Scenario #8: 'The Brothers Kalashnikov' - A 'Chain of Command' AAR


This scenario is based on a short passage I came across while reading the post-apocalyptic novel 'Metro 2033' (a book I had posted on a few months ago). To recap, the premise of 'Metro 2033' is that in 2013 a nuclear/biological war devastates most of the world - twenty years later, the survivors of Moscow exist in the city's subway system, struggling to survive within a new dark age. 


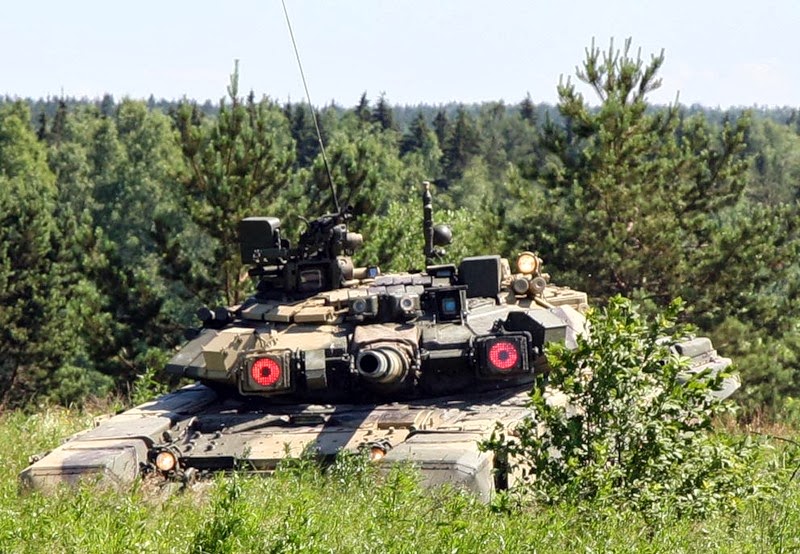
In the book, the hero, Artyom, visits with an 'old timer' who, as a young man, served as a Russian army radio operator before 'the vodka hit the candle'. Over a campfire, the old vet tells Artyom about a T-90 tank crew, who having survived the initial nuclear strikes, decides to take their tank and slowly (and with many adventures) make their way east, into the less damaged interior of Russia. Here, along with other survivors, the tank crew digs-in their T-90 to serve as a defensive pillbox and begins a small community. The old timer says he lost contact with the group years ago but hopes that they've fared well.


This little side-story really captured my imagination and I thought it would provide a great setting for a small scenario. 

For rules I decided to use the new(ish) 'Chain of Command' with the addition of a couple modifications for a bit of post-apoc colour (more on that below).

The scenario's premise is that a few weeks prior to the events of the game, a local band of nasty 'Zone Raiders', commanded by four brothers ('The Brothers Kalashnikov'), overran a group of survivors from which they found a cache of priceless diesel fuel and a few crates of 125mm tank ammunition. The leader of the raiders knows of the dug-in T-90 (in fact he's obsessed with it) and schemes that if they can seize the tank from the settlers, refuel and rearm it, his band of mutated reprobates will be able to dominate the entire region.

I ran this game twice. Once for the lads from the Fawcett Ave Conscripts and again for our group here at home. For this AAR I describe what happened to the players in Regina, though the final outcome was very similar to that experienced by the lads in Winnipeg.

Below is an 'aerial' photo of the battlefield. The edge of the settlers' village is at the bottom of the image with their T-90 tank dug in, hull down, facing out from the hillside.   They also have a series of entrenchments arrayed in front of the hill with a bit of dead ground to their front (though this has been encroached upon by trees and crops as time has gone by). There is a small graveyard above and to the left of the entrenchments. There is also a burned-out village near the center of the table which includes a ruined church and coal tower. The rest of the table is made up of an assortment of trees and garden plots. 


The next image shows where both the Raiders and the Settlers have established their 'jump-off' points from which they will be able to deploy their troops. As you can see the Raiders have established jump-off points near and in the destroyed village and along the left-hand treeline, close to the graveyard. The Settlers have set the majority of their jump-off positions along the forward entrenchments, with one being held back near to the T-90.


For forces, the Raiders have three squads, each squad composed of a eight man rifle team along with a LMG team of four men. Two of the squads are rated green while the third is composed of veteran picked-men. The Raiders are led by 'The Brothers Kalashnikov' with each squad being led by one of the brothers (Junior Leaders in CoC terms) while the eldest brother commands the entire raiding force.

The Settlers are led by Boris, the original commander of the T-90, along with his son Yuri. Together they have fourteen men and women, ten riflemen and four in a LMG team. The Settlers are classed as regulars.  

Boris and son Yuri (both mounted on hex-shaped bases) command their fellow settlers in the defence of their village.
In addition, just before the Raider assault began, Boris managed to signal a plea for help to a nearby encampment composed of old hard-as-nails ex-Spetsnaz troopers. These guys are in heavy body armour and are classed as veterans. Due to their age (old wounds, too much vodka and bad joints) they move at a -1. Boris' Spetsnaz neighbours will arrive at the beginning of the 3rd turn.

Spetsnaz trooperx (gone-to-seed but still dangerous) rolling out as 'possible' reinforcements
After everyone had established their jump-off points I allowed the the Raiders to deploy a sniper who was secretly positioned in a second floor window in the ruined village. From there he had a commanding view of most of the battlefield (becoming a sporadic but very annoying thorn in the Settlers' side).

For a bit of post-apoc seasoning I added a few special rules into the mix. One was that even though EVERYONE carried an AK47, and there was a relative abundance of LMGs and HMGs on the table, the quality of the ammunition was very bad (being either over 20 years old or, worse yet, home made). So when a group fires its AKs and rolls more 1s than 6s then they will not be able to fire at full auto for the next turn (reduced to 1 die for each rifle) - this replicates the jamming and furious magazine swaps from bad ammo. Similarly for the LMGs and HMGs a die is rolled separately for each shot, if it is a 1 then the gun suffers a stoppage, and for any following 'shots' it will take a 5-6 to clear the stoppage in which case the gun can continue firing at its remaining rate of fire (but still looking out for 1s). I gave each team one turn of worry-free shooting, saying that each man had hoarded one clip/drum of military grade ammunition which would not be in danger of jamming. This turned out to be pretty fun in the game as each side bit their nails to see if their automatic weapons would work as they should and just when they should use their military grade ammo. For the heavy body armour of the Spetsnaz troopers I ruled that they would always be treated as being in Light Cover (upgraded to Heavy Cover if they were in terrain that provided some protection).

The game began with the Raiders jumping off with a squad (reinforced with a LMG) in the woods on the Settler's left flank and another within a field near the central wood. As the Raiders had no targets (the Settlers being hunkered down offboard) they ended their phase. 

Raiders moving forward under fire through a wood - figures from Pig Iron, painted by Greg
The Settlers' first phase started with a bang as they emerged ('jumped off' in CoC parlance) at their entrenchments and rattled off a 7.62mm 'greeting' towards the Raiders in the woods. This caused a point of shock but not much else. Next, one of the Settlers emerged from the tank cupola and began to rock-and-roll with the HMG causing a couple casualties and more shock on the same Raider squad in the woods.  To add insult to injury the Settlers rolled well enough to sustain their actions for another phase and continued to hammer away at the poor hapless Raiders causing more mayhem. These bad ladz were not having a good run of it!

Nonetheless, when the Raiders began their next phase their sniper cracked off a shot at the HMG gunner (who was isolated on the tank) and shocked him so badly that he broke and ran, leaving the HMG unmanned.

The Raider sniper lining up his shot on the HMG, getting fire direction from a nearby leader - figures from Pig Iron, painted by Greg
The Raiders then moved their squad up to the wood edge in order to get their LMG into close range, while their other squad began to move towards the edge of the central wood.

I'll telescope time here a bit and briefly describe the ensuing action which occurred over the next 20 or so phases:

While they managed to cause a few casualties on the entrenched Settlers, the Raider squad in the wood on the left flank ultimately broke and fell back under the punishing fire. 

Boris, the Settler leader, sent another runner back to the tank to re-man the HMG. 


A Settler clambering onto the T90 to man the HMG...
The lad made it to the T-90 but only lived long enough to fire off a single burst before he was killed by a single shot from the sniper. During this game the sniper also managed to wound both Boris and his son Yuri (reducing their command abilities).

...only to be ruthlessly sniped by the marksman back in the burnt-out village.
The Raiders who had moved into the central wood suffered much the same fate as their compatriots but they did manage to pull a few teeth before having to withdraw, carrying back as many wounded as they could.  


By this time the Raiders had deployed their last ace-in-the-hole: their veteran rifle team which was supported by a LMG unit. They advanced deftly under fire and began to press the Settlers heavily, breaking their LMG team which severely reduced the villagers' firepower.

Raider LMG - figures from some obscure outfit, painting by Greg.
By the beginning of Turn 3 the game was winding down to a nail-biting conclusion. The Raiders' veteran squad, led by the elder brother, moved through the central wood toward their final assault positions. Meanwhile, the remnants of Boris' force (down to four riflemen and his wounded son) looked over their shoulders for any sign of reinforcement from their Spetsnaz neighbours.

The Raider assault goes in...
Just as the Raiders began their assault (they used a Chain of Command Dice to initiate their run-in), a well-worn APC rolled up next to the T-90 and disgorged a somewhat creaky team of hard-bitten warriors in heavy body armour. Nonetheless, while the Spetsnaz had finally arrived, they decided to hold back to see what would happen in the aftermath of the assault before they would commit one way or the other.

...the Spetsnaz de-bus next to their BTR to see what happens...
Even though the Raiders had the advantage in quality and a marginal edge in numbers the fact that the Settlers were in entrenchments made the fight virtually equal. So both sides rolled their dice... and in a total collapse of fortune the Raiders were wiped out to a man. From the smoking entrenchments Boris, Yuri and two Settlers emerged to squint back at the approaching Spetsnaz...

...and the game hangs in the balance with the final dice roll.
It was a great game which came right down to the wire. The Raiders had a looong streak of appalling luck (Brett? Stacy? How did you insult the Dice Gods so?) which probably cost them the game in the end, but they did a great job in pushing the Settlers to their limits. It was always going to be tough proposition for the Raiders to assault dug-in positions, and they almost pulled it off, but fortune favoured Boris and Yuri. 

I really have to thank the guys from both groups for being such good natured guinea pigs with this scenario. I had a wonderful time running it and look forward to the next outing.  Special thanks go to Greg for providing the superb Russian vehicles and the Raider force - I couldn't have pulled off the scenario without his help. I hope those who've read this AAR liked it as well.

Monday, June 25, 2012

'Worst Case Scenario #2' - The Crossing at Nussdorf - May 13, 1809

Voltigeurs crossing the Danube by barge.
One of my favorite wargaming subjects is the 1809 Austrian campaign, in particular the Battle of Aspern-Essling. It is regarded as a one of the pivotal actions of the Napoleonic period as it showed to the world that Bonapart, a man who up to that point had never tasted the bitter fruit of defeat, could actually be beaten.

...

Saturday, June 16, 2012

'Worst Case Scenario #1': The Combat of the Thirty / Combat des Trente, 1351


I came across a description of this little donnybrook while reading Barbara Tuchman's 'A Distant Mirror' and thought it might be a good scenario for a large, multi-player game.

By 1351 the Hundred Years War was already grinding through its first generation of combatants. The Battle of Crecy (1346) had been an unmitigated disaster for the prestige of French arms and it had placed their nobility on their collective back foot for years afterwards. With the French warrior elite seriously denuded by arrowshafts it allowed bands of mercenary companies (much of them English soldiers unemployed from the King's service) to roam the countryside, raiding and laying waste to large areas of France. 


...

Thursday, June 14, 2012

A New Column - 'Worst Case Scenario'


'No one understands my mad, mad genius... '
(Who amongst you remembers that book cover?)
Ok, I have to come clean about something.

I have an addiction.

I'm hopelessly hooked on game scenarios.

You see, game scenarios are like a drug to me. They are my smack. My kryptonite. I am defenseless against their overwhelming power of dorkiness. I have stacks and stacks of the freakin' things stashed around the house. They can be for any game really; historical, sci-fi or fantasy, it doesn't really matter - cripes, most of them are for systems I don't even play. I usually have a scenario book in my shoulder tote at all times (you never know when you might get bored at a meeting). My wife even lets me read the bloody things at the dinner table - bless her soul. She puts up with me flipping through pages, looking at charts, chortling away between forkfuls of food and gulps of bad plonk, gleefully snorting at umpire's notes and idiotically grinning at victory conditions. Its a sickness really.

Next to reading scenarios I also really enjoy creating them. Grid maps, entry points, reinforcement tables, special events cards; to me they are like some kind of nerd poetry. I often will find myself reading a book or watching a film and think, damn, this would make an excellent scenario. Sometimes I get them onto paper, but often they slip past my espresso-addled mind.

Anyway, I thought I'd share this particular fetish with you by starting a new regular column on the blog that I'm calling either 'Worst Case Scenario' or 'Half-Baked Plan' (By popular vote its  officially 'Worst Case Scenario'!) which will focus on a dog's breakfast of ideas for game scenarios. To be honest these will be pretty rough concepts, not fully-developed or necessarily ready-to-play, but I hope that they might inspire others to take them to the next level and actually try them out. Anyway, I'll give it a whirl and see where it goes.

First up: some orderly, courtly and courteous slaughter from the Hundred Years War...


Monday, February 27, 2012

Napoleonic Scenario: Vandamme's Assault on the Stare Vinohrady, Austerlitz December 2nd, 1805


Last weekend Greg and his lovely wife, Linda, came for a holiday weekend visit to which we all ate and drank to excess and caught up on our sleep. Greg and I also took the requisite time to game like men possessed. On top of a suitably bloody game of SAGA, and reacquainting ourselves with 'Conflict of Heroes' we also played a cataclysmic 'Spearhead' scenario set in the opening hours of Kursk. These were all great fun, but undoubtedly the main event was our Napoleonic scenario based on the French attack on the Allied center at Austerlitz in December 1805.

Historically, Vandame's assault on the Stare Vinohrady was virtually a non-contest. The remnants of the mauled Allied IV Column, composed of six battalions of the IR#23, five severely reduced Russian battalions and their attached artillery, tried to hold the heights, but the French had both the numbers and the quality to quickly overwhelm them. Nevertheless, in reading the numerous accounts of the engagement I thought there were a few 'what-ifs' that  if cobbled together could make a viable, if somewhat asymmetrical scenario. The following is what piqued my interest:
  • Scott Bowden's 'Napoleon and Austerlitz' describes the Austrian and Russian contingents as separate actions even though they occurred very close to one another on the Pratzen Heights. I think much of this had to do with both the difficulty of communication between the Austrian and Russian partners along with the fact that the Allies wanted to cover-off as much of the heights as possible. Nonetheless, what if the Allies had drawn themselves closer together to better support one another, would it have helped?
  • Bowden further describes that the two Allied contingents did not make good use of the available ground, which had several vineyards below the summit (thus the name 'Vinohrady'). These would have slowed down infantry attacks and pretty much nullified threats from cavalry. Historically the Allies deployed well back from the vineyards, surrendering their advantages to the French light infantry. So what if the Allies had positioned their forces to take better advantage of the available ground, could it have aided their defence of the heights?
  • In David Chandler's 'Austerlitz, 1805' he obliquely mentions another unit of Kolowrat's command, Infantry Regiment #24, being in support of IR#23. Reportedly this was a depot battalion of around 400 conscripts, but I reasoned that every man would have helped to spread out the line on the Heights and so included them in my Order of Battle. I also added cavalry support to both sides. The French had access to Boye's Dragoon brigade (which was historically on-hand) and the Allies now have two regiments (Dragoons and Hussars) originally from Liechtenstein's V Column of cavalry and Wodiansky's Advance Guard. So, finally, what if the Allied High Command had released more cavalry assets to the defence of the Heights?
So for our scenario I incorporated the above conjectures and worked with the hypothesis that Kolowrat and Miloradovich have decided to concentrate and coordinate their efforts thereby bringing their forces together - forcing Vandamme to engage them as a combined force on the summit, on advantageous ground of their choosing. 

A map of the rough dispositions of the two armies as seen at the start of the action. 
For our game we used our home-grown rules, 'Food for Powder', which do a very good job of reflecting unbalanced engagements. This battle was actually fairly large for a battalion-level game (24 battalions, 4 regiments of cavalry and 3 batteries of guns) so we played it on a 6x10 surface to give us enough room to maneuver. Some may notice that I did not model the Heights on the tabletop - in my reading it seemed to suggest that the path Vandamme took on his assault was along a very gradual slope and therefore would not have granted much tactical superiority to the Allies so I decided to leave out modeling the Heights for sake of clarity.

The Stare Vinohrady today as seen from Vandamme's initial positions.
For our battle we had John and Dan on the French side, while Greg and Sylvain ran the Austrians and Russians respectively.


Here the French commanders, Dan and John, look on with Stacy (on the right) assisting as umpire.
Greg and Sylvain commanded the Austro-Russian force.
The first turn was fairly quiet, seeing the French move towards the heights along their entire front, including their guns. For the Allies, they stayed in place but were very lucky in their reinforcement roll and an composite brigade of cavalry (Austrian Hussars and Dragoons) arrived on their right flank. Greg formed them up in column of squadrons, with the Hussars leading and the Dragoons in support.


In the second Turn the French brought in their own cavalry in the form of Boye's bigade of Dragoons (under Dan). They deployed on the French right flank, in extended column of squadrons, diagonal to the Austrian cavalry. This choice of deployment had a critical impact in the following turns for both sides as the cavalry had free reign in each of their sectors. Eyebrows were duly raised with this heap of snorting cavalry showing up on the tabletop all at once.

Boye's Dragoon Brigade heading towards the Russian line.
Amongst our group, Sylvain is legendary for his caution so you can imagine the hoots of derision when he began to retrograde his Russians in response to the arrival of the French Dragoons. (As you will see Sylvain had the last laugh as his refusal of the left flank probably saved the Allied line.)

Shown here are three of the five understrength and exhausted Russian battalions that held the Allied left flank.
The third turn was a corker. First thing you have to understand that Dan is the antithesis of Sylvain. I like to think of Dan as the General Haig of miniature wargaming. To Dan's way of thinking 'If the first assault does not break them then the twelfth will certainly do the trick...' As such Dan's French Dragoons duly charged the Russian left flank as soon as they got the chance. Since the charge began from a long distance away (practically in Vienna) the Russian battalions had enough time to form squares. Undeterred, Dan noted that most of the Russian squares were not well-formed (our rules differentiate between 'solid' and 'hasty' squares) and so sent in the leading regiment of Dragoons to see if the Russians would loose their bottle. It was not meant to be. The Russians held their position and repulsed the Dragoons, but not without suffering some casualties and disorder in their ranks.


The nervous Austrian line, jammed full of conscripts and raw troops.
Meanwhile in the center, one French battalion decided to take the bit by the teeth and move ahead of the advance in line formation... While up the slope the two Allied artillery batteries hammered away at the approaching French columns, who inexplicably neglected to shake-out into less target-rich line formations and so consequently paid the price.


Back to the Allied left, Greg noted the impetuous advance of the solitary French battalion with an arched eyebrow, and thought it was too good of an opportunity for his Austrian Hussars to pass up. Greg knew he'd have to 'roll Vegas' to get the requisite moves in order to close, but he rolled the dice hoping they'd be kind to him. Well, the dice gods were smiling on Austria and Greg managed change formation, sound the charge and head for the French battalion.

The Austrian Hussars receive their order to charge...
Several French squares watch apprehensively as the Austrian Hussars begin to move across their front...
Again, as the charge originated from so far away the French battalion had a very good chance to form square. In 'Food for Powder' there are Impetus Dice (good mojo) and Friction Dice (bad mojo). Both Impetus and Friction are drawn from unit quality, officer rating and environmental conditions. Both are rolled simultaneously and you literally have to take the good with the bad (or vis a vis). Well, John rolled well enough with his Impetus dice, but the Friction roll was completely off the register - to the extent that the French battalion continued to trudge along, wondering why the ground was shaking, trumpets were blaring and their comrades to the rear were waving their arms and shouting...

'Ah! Zee target is in sight - Sound ze Charge!!'
A French ADC tries to warn the battalion of its imminent danger...
As John would say later, his battalion 'had the distinct misfortune of being ridden down by the 'flyboys' of the Horse & Musket era'. The only thing that saved the French battalion from complete annihilation was that the Austrian Hussars were at the end of their tether and very fatigued, so the mauled survivors were able to make their escape.

... but too late - the Hussars are upon them!
Turn four saw the French grind forward, closing with the Allied positions while the Russian and Allied guns gutted a French column. Nonetheless, the 1st of the 57th 'Le Terribles' got into action against the Russians and quickly broke a battalion that had been forced into square by the nearby French Dragoons. The French guns were dragged forward 'by bricole' and unlimbered in preparation to punish the tightly packed Russian formations. I'm sure there were many muttered prayers in those formations...

In the center Greg knew his victorious Hussars were desperately exposed and winded so he committed his remaining cavalry, the Dragoons to try to cover their retreat.  This turned out to be a little Pyrrhic as the Dragoons were shot to pieces by every French battalion's voltigeurs on their 'Death Ride' to the Hussars' support. Nonetheless, the exhausted 'flyboys' of the game managed to get extricated and began their ride back to Austrian high command to present the French colours they had captured.

Kolowrat receiving the news of the capture of a French eagle.
I'm sorry I cannot give a final account of the scenario as this is where we decided to break for the evening (we spent a lot of time laughing, eating and drinking.) Nonetheless, we looked over the field at 'halftime' and surmised that while the French had certainly been rebuffed in a few areas they were still in an excellent position on the Allied left flank to start an envelopment with combined arms. The fragile Allied line composed of reduced battalions and conscripts had not yet been truly tested and it would be touch-and-go to tell how it would turn out for them. It was really anybody's game.

Looking from the French left across the battlefield.
It was great fun, and all of it due to an excellent bunch of guys to game with. I extend my thanks to them all for making the night so entertaining. A special thank you goes to Greg and John who both travelled great distances to attend and brought many beautiful toys from their own collections in order to make the game that much more colourful - bravo! 

I had such a good time that I'm already planning for the next Napoleonic weekend...