Showing posts with label An Idiot in Paradise. Show all posts

Monday, November 8, 2021

Hobby Studio Build: Part IV (Wrap Up)

Hi all! 

It's been a few months since I did an update on my hobby studio build, so here's the final chapter on this year-long project. 

When I last reported the siding was just installed, which I think looks quite good, especially considering we had pretty much forgotten what we had ordered with the litany of Covid-reasoned shipping delays.

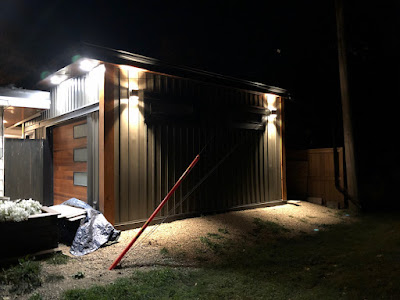
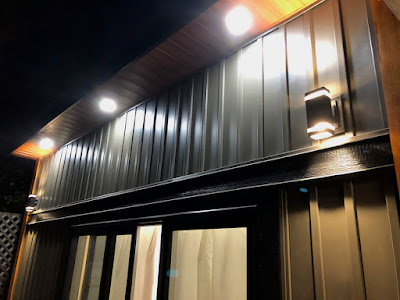
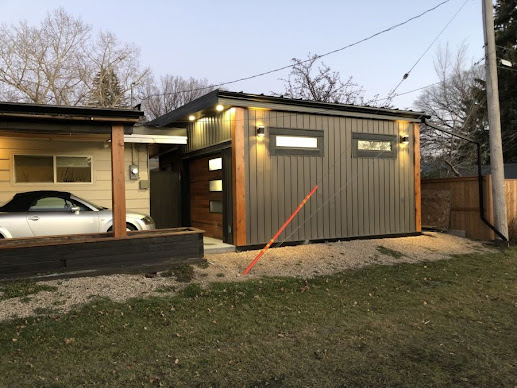
Next up was the exterior lighting. I went with two sets of two LED sconces, both along the exterior facing the greenspace, and illuminating our interior courtyard. For further safety and security, I augmented the sconces with a few small motion sensitive LED potlights installed in the eaves.


As we were heading into cooler weather, I was very keen to get the interior fully insulated, drywalled and painted, so late August was a very busy month taken up with these tasks.

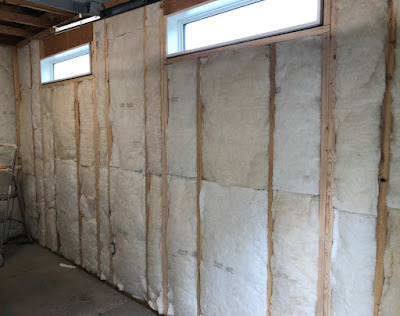
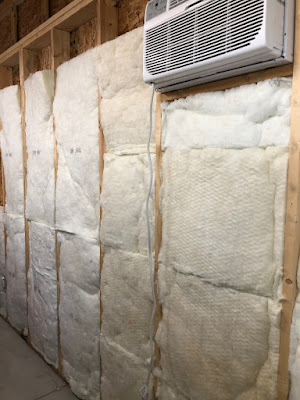
First, we put in R24 batt insulation into all the vertical wall spaces.

I also installed a in-wall split air conditioner/heater. It will be handy for those hot summer days (we had a LOT of those this year), and will help augment the heat during the winter.


Unlike the nasty old pink insulation, this stuff wasn't too itchy and went in fairly quickly.

Then came the vapour barrier...


...the (incredibly heavy) drywall...


... and the taping, mudding and (super dusty) sanding.


After a coat of primer, I painted the walls with four coats of a fairly innocuous pale yellow. 

After the paint dried, I had it all trimmed out with simple pine with just a plain clear coat on it. I sort of like its plain, minimalist look.


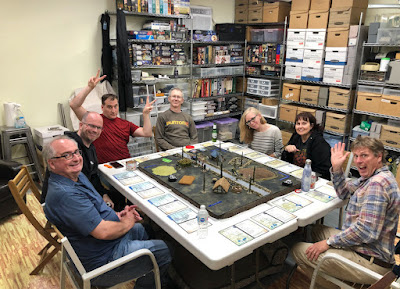
...then I had to celebrate this milestone with a game with friends!


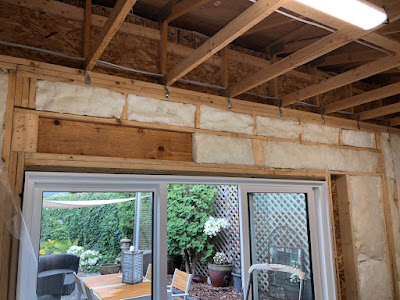
Okay, back to it. For the upper section and roof deck I was lucky enough to negotiate a  discounted price to have spray foam installed. I'm glad I did this as I found it really did a great job in sealing and insulating the upper space, and only took about 3 hours to have done. Win!


I'll probably have the ceiling finished in pine tongue-and-groove for a Scandinavian look, but that will be down the road as a late winter project. 

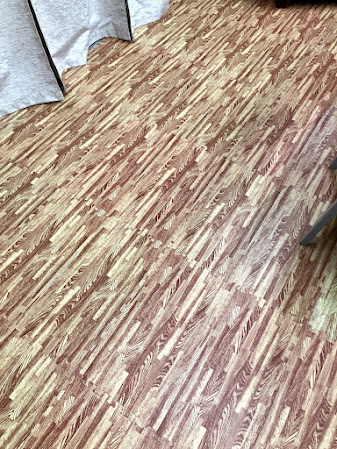
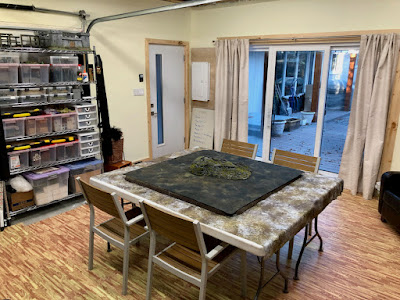
For the flooring, I found these groovy interlocking foam tiles that have a faux wood finish. They were as cheap as borscht (working out to less than a buck per square foot), can be cut to fit corners/edges with a craft blade, and provides a nice, insulated, cushiony surface over the concrete floor.


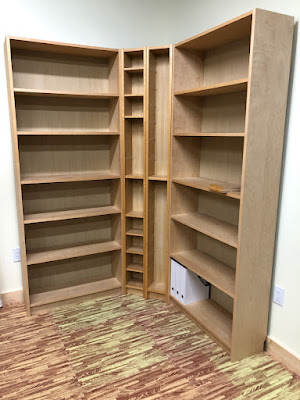
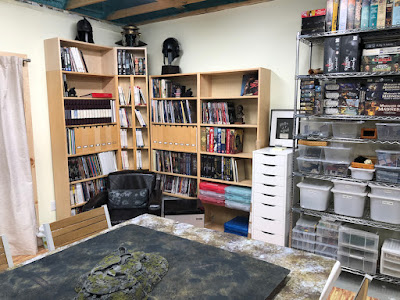
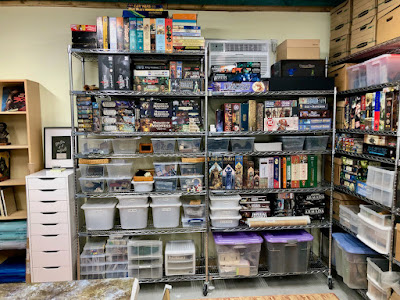
Once that was in, then the real fun stuff started, with the moving in of shelving, along with boxes (and boxes, and boxes) of hobby stuff.
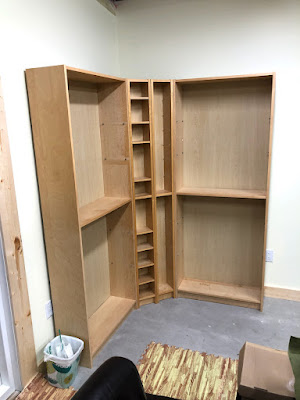
Billy is your friend.


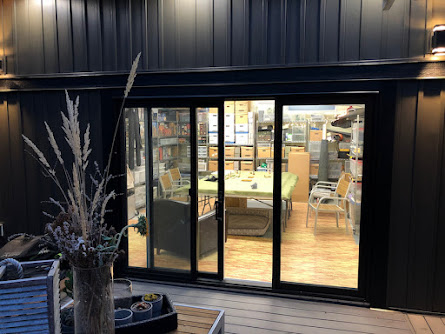
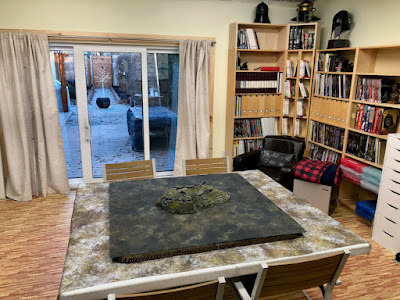
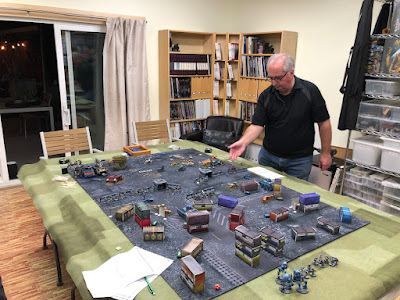
As a recap, the footprint of the space is roughly 350 square feet, with 9 foot high walls (allowing an extra few shelves of storage on all the units). The studio can comfortably accommodate a 6 x 8 gaming table with around 4 feet of floor space around it. So, quite a bit of room to get up and walk about during games without feeling too hemmed in.  


There's still lots to tweak and fine-tune (perhaps a bespoke gaming table?), but as you can see with my smug, satisfied smile, I'm very happy with how the whole project came off, and am looking forward to hosting friends to many hours of fun in the future. 


Thanks for dropping in folks. I hope you all have a terrific week!

Next up: My minimalist ECW project

- Curt
Monday, June 15, 2020

Resurfacing, a Mine Entrance and a Construction Project

Forgive me hobbyists, for I have sinned. It's been over a month since my last submission...

Excuses? Yes, work has amped-up, there is that, but in fact it's more about the wonderful spring weather we've been having that's stolen me away from the hobby desk. While our winters in the Canadian prairies can be brutal, the other three seasons can be glorious, and when this happens the paints, brushes and figures play second-fiddle to the dogs, deck and yard stuff. 

Nonetheless, while I've been shamefully absent from posting to the blog, I've still managed to keep involved in a few hobby-like things. 

First, this protected mine entrance for my Siege of Malta project. 


During the siege, the Ottomans made very clever use of sappers who dug shafts and mines in order to collapse the island's outer defenses. I thought this would provide a nice  centerpiece for a scenario where the defenders sally out to try to disrupt the besiegers.


This is a one piece vac-formed terrain piece from Vatican Enterprises (previously Hudson & Allen).


The other hobby project, one that has been absorbing a lot of my spare time, has been the planning for the construction of a hobby-studio on our property.

Having a dedicated gaming space has been a long-held dream of mine. Our home, while very comfortable, is limited in its layout in providing a dedicated space for gaming and hobby stuff. I typically host games on our dining room table (with all the frantic game preparations and laborious tear-downs that entails), and my hobby storage is limited to where I can find nooks and crannies around the house to squirrel things away. 

One scenario had us looking for a new place which could accommodate our various wants and needs, but we found the search next to impossible as we've grown quite attached to our existing home and were reluctant to leave our neighbourhood. So the resulting compromise was to construct a structure on our property that could serve as an additional space for games and hobbies. So we contracted a wonderful designer who took in my various ideas and provided a few concepts for us to work from. Below is the one we went with.

A few views from the architectural plans of the proposed hobby studio.

It's a bit of a Q-Ship really. For the purposes of getting a building permit and local tax assessment the structure has been declared as a 'detached single-car garage', which it certainly is, but in reality the interior will be kitted-out for full-on hobby geekery (i.e. loads of shelving, figure storage and a decent sized game table). With us living in Canada this project involves lots of infrastructure considerations like heating, cooling, venting, vapour barriers, water drainage, property line setbacks, the works. It's really like building a separate mini-house.

One of its best features is that it features a 12' bank of glass sliding doors which will overlook our deck and garden. This will provide lots of light and give us a nice place to step out have a drink or two during games. 

Anyway, the building site has been cleared and we're just awaiting the city's go-ahead to begin foundation work and construction. To say I'm very excited would be an understatement. My plan is to have the basic structure up and enclosed by autumn with the finishing work to be wrapped up next spring. Wish me luck!

Curt

Monday, September 23, 2019

2mm Napoleonics! (Or, 'What I did During my Summer Vacation, Part I')


We had a very nice, restful summer, with lots of lazy days and bright sunshine to sit back and recharge the batteries. While I did spend a lot of time outside puttering with some landscape projects, I did manage to get to grips with a couple hobby things as well. One of them, still ongoing, is building-up a Sisters of Battle force (I hate saying 'army' for something that's usually composed of 30-40 figures) for a friends-themed event being held later this autumn. Lots of nostalgia with that one as the Sisters were my first 40K army before I reluctantly sold them off to finance a trip to Europe - I'll get into describing that gambit in a future post.

So what's the other project that has occupied many of my summer evenings? Well, again, it's another old flame, but this time instead of boltguns and chainswords, its back to muskets and shakos.  Napoleonics - 'The Beautiful Game' - remains my first miniature wargames love and for me it's experienced a bit of a renaissance with the release of Dan Brown's excellent 'General d'Armee' (GdA). The rules are quite 'crunchy' and somewhat overwrought in some spots, but on the whole they're pretty darn good and, for me, they manage to hit most of the sweet spots for a battalion-level set of instructions. The most important result from this resurgent interest is that it's driven me to get more Napoleonic games on the tabletop.

After a few recent games I came to the conclusion that I wanted to try playing this level of game in a figure scale smaller than 28mm. Don't get me wrong, I love all the colour and pageantry of 28mm Napoleonics, BUT the size of the units often constrains how much can be reasonably put on a normal tabletop. We typically game on an 8'x5' playing surface, and, allowing for room for flanks and a few bits of interesting terrain this means that we hit the limit at around 15 units per side. In Napoleonic terms that's around two to three brigades - a nice little game, but still fairly limited in scope. So, I really wanted the ability to do larger divisional-level games while still having room for the units to 'breathe'.

With all this in mind, I played around with the idea of expanding my recently repatriated 15mm collection (thanks Greg!). I even retouched/rebased a few units to see how they'd look - not bad, but I would need significantly more units, meaning lots of figures and heaps of painting. Definitely possible, but I needed to think on this more before pulling the trigger. Then, one afternoon I found myself looking through our display cabinets and came across my proof-of-concept 3mm ACW units that I did-up a few years back. I was reminded by how neat the 1:1 arrangement looked and wondered if I could 3D print something similar for Napoleonics, say in 2mm. I then remembered an online conversation I had with Zach, the talented creator of Forward March Studios about his 2mm range of figures. Well, it turns out that Zach is now offering his entire library of 3D print files for a very reasonable price. Inspired by this, I duly plunked down for the series of designs and began the process of test printing and plotting possible unit layouts.

Here is a selection of 2mm models from Forward March. From front to back, a 2-flag infantry stand, a squadron of cavalry a round command stand, a load of windmills and a row of German themed houses.

After playing around with the raw printed models I quickly came to the conclusion that due to the relative ease of printing, assembly and painting, I wanted to create units which were more like boardgame playing pieces, composed of one base highlighting a specific formation. For example, a unit in line formation would be a single base with the battalion arrayed in line, whereas if it changed into column, or square, it would be swapped-out for a base reflecting those particular formations. This would be quite different the common multi-base approach, where players switch around their component unit bases to mimic the formations they need. Ok, why do this? Well, the thing that really excited me about this scale was its ability to convey how these formations would really look in relation to one another.  


In this scale, the British 2-rank line looks realistically thin and elongated when compared to the bulkier 3-rank lines used by the French (and most continental armies). In looking at the British line, one can see how many French commanders would have thought that its apparent fragility would be susceptible to mass column attacks - not so much as it turned out.

Cavalry formations look great in this scale as well as the massed units really help emphasize the space that was required to properly maneuver these large groups of horsemen. 


Here are two British cavalry regiments with the one in the foreground in columns of squadrons and the other drawn up in line.
One formation that I especially enjoyed working on was the artillery batteries. Quite understandably due to cost and space considerations, artillery in most tabletop collections rarely illustrate the depth gun batteries would absorb, what with their limbers, ammunition caissons and support wagons. But doing this in 2mm it's an absolute doodle.  


Above is a French 8-gun battery deployed for action. The depth of the formation is to illustrate the space required to accommodate the supporting ammunition caissons and support wagons.
Note: for the artillery I broke my own rule by having them arrayed on multiple bases as I wanted to allow segments to be removed in order to allow other formations to park or move through it, something that was commonly done on the battlefield.


So, with a bit of head scratching and eraser nibbling I came up with a series of base shapes that could reflect the various formations commonly used during the period. I estimated I wanted around 30 battalions of infantry each for the French, Austrian, Prussian British and Russians, with a half dozen batteries and around 10 regiments of cavalry as supports. I reasoned that this 'recipe' would give me enough units to reflect a good sized corps per side and not overstress a modest sized table.


After I decided on my basing recipe, my good friend Byron over at Northern Lights Terrain cut me up a schwack of MDF bases to start the process.

Eagle-eyed readers with 15mm collections will see that that frontage of my units are probably not that far off from their own - it's really in the depth that the this scale really differentiates itself. 

Is this in true 1:1 scale? No, but its very close. I estimate that these formations are roughly at 1: 1.3 ratio. Not bad! 


The Process

The assembly and painting of these bases is a fairly straightforward affair - its definitely more of an assembly line  approach than working with larger scales.

I find one of the tricks to tackling small scale projects is getting the basing and colour pallet right. My colour choices I'll talk about below, as to the bases, personally, I like them fairly thick (3mm) as it gives something to grip onto. I also like my bases with rounded corners as it gives the finished stands an almost chit/playing piece look about them. Horses for courses though!

The 3D prints I used for this project makes it very easy to organize and glue down the formations onto the bases, you just mix and match figure strips to the formation you want to do. 


They don't look like much, but we'll see what we can make of them.

This unit will be a standard-sized French battalion, in line formation, five companies wide (the sixth company is assumed to be detached on skirmishing duties).


After the component pieces have been glued down, I apply a layer of fine sand over thinned down PVA on the base. I leave out a small corner section for the unit label and I glue down a steel shim for magnetized markers (more on that later).


Once the sand dries, I prime the base dark brown, and then apply an overspray of grey to help 'lift' lighter colours used later in the process. The groundwork is then painted a chocolate brown, drybrushed up with a mid and light browns and finally ending in a light khaki dusting. I just use cheap craft paint for all this work. 


Yes, the base looks a bit wierd at this point, but the next step will set things to right. The base is given several coats of green emulsion from Woodland Scenics. A great product as I find it gives a very nice semi-opaque green effect to the groundwork. 


Next is painting the figures themselves. Because of the extremely small scale, I typically use very bright (and very unhistorical) colours so they're easier to see on the tabletop. I simply paint the top half in the 'national' tunic colour - in this case a fairly vibrant blue for the French. I then paint an off-white strip along the bottom and highlight to indicate their trousers. 


The light blue is then inked (or washed) with a darker shade. This will sink into the recesses and temporarily darken the overall tone. For the French I use Liquitex Prussian Blue ink (yeah, go figure).


I then highlight with the original colour (light blue in this case) with a few additional spots further lifted with some white mixed in. This gives the figures a bit more depth and aids in their overall visibility. 


In order to make the figures better stand out on the base, I outline the formation with a dark brown mixed with a touch of black to create a shadow effect.

Usually the flags are the most fiddly part of the process, but I think the extra time invested really finishes off the base nicely. The French tricolour is fairly easy to do, whereas the British Union Jack can be a bit of a bear!

Aaand that's it for painting the figures. Yes, its very, VERY basic, but I've found that less is more when working with these smaller scales - if you try to paint too much detail it can often muddy the overall effect.

Now, we're almost done: The bases are given a very light scatter of fine flock over thinned PVA. Not too much though, just an impression, going heavy on the flock can often overwhelm the figures.


Finally I touch up the base edge with dark brown, affix a unit label at the bottom corner and magnetize the bottom for safe transport. Done!


The crescent shaped bases are skirmishers.

An early test game using the figures (no highlighting or flocking yet - slacker). You can see some of the magnetic casualty status markers on a few of the French units.

I can usually get around 4-6 bases done during an evening's sitting, so roughly a brigade. In preparations for our first game I managed to get 20 battalions of infantry, 4 cavalry regiments and 2 artillery batteries done in around 2 weeks of work - I certainly couldn't have done that in 28mm! 

Two regiments of French cavalry in line supporting a brigade of infantry.


Status Markers


I like using roster sheets to keep tabletop clutter to a minimum and for this project I wanted to take it further by having that ability to denote status right on top of the unit. For example, in GDA units can endure around 8-15 points of damage before breaking. I equated this to three levels/stages of attrition which a unit can be marked: blue for light damage, yellow for medium and red for critical. This way opposing players don't have perfect intelligence on precisely how knocked about an enemy unit is. 

So to do this I purchased a pack of magnetic map 'pins' and then spray painted them in the three status colours. I keep them affixed to a thin steel sheet handy for the players to pull from. 


During games we simply pick off the markers we need from the steel sheet and place them on the steel square located on the bottom left of each unit. This provides a relatively minimalist approach to marking unit status without having to use dice, counters, etc.


This French brigade is a bit of a bad way. The lovely tree bases are by the very talented Mr. Miles Reidy.


Storage

Storage is frequently a struggle for many miniature gamers as there just doesn't seem to be enough room to squirrel away all the shiny things we acquire. A great aspect of collecting microscale armies is that their storage and transport is SOOOO much easier than dealing with larger scales. 

For this project I found that I could use inexpensive photo scrapbooking containers sourced from one of our local big box craft stores. 


The larger containers can carry two of the thinner cases. I've estimated that each nationality could fit in four of the smaller cases, all nestled in two of the larger containers. Since they were available in multiple colours I snagged a pair for most of the nations' livery, red for British, light blue for French, white for Austrians/Spanish, and dark blue for Prussians. I just need to find a set of green cases for the Russians...

This entire project, encompassing five national armies, will fit in 10 cases. This makes it not only very compact to store, but is also fairly straightforward to select, transport and use during games. 

____________________________

Okay, <phew> there you have it. A VERY long post (sorry about that!) of me describing how I spent a good portion of my summer evenings. A bit mental, but good fun.

I plan to do a few more updates on this project in order to cover terrain and a few oddball formations/units. Also, keep an eye out for a Peninsular War scenario that we've developed using these figures; that will be coming up soon as well.

Thanks for dropping in folks. Have a great week!

Next up: Sisters of Battle!