Showing posts with label AB Miniatures. Show all posts

Monday, February 22, 2021

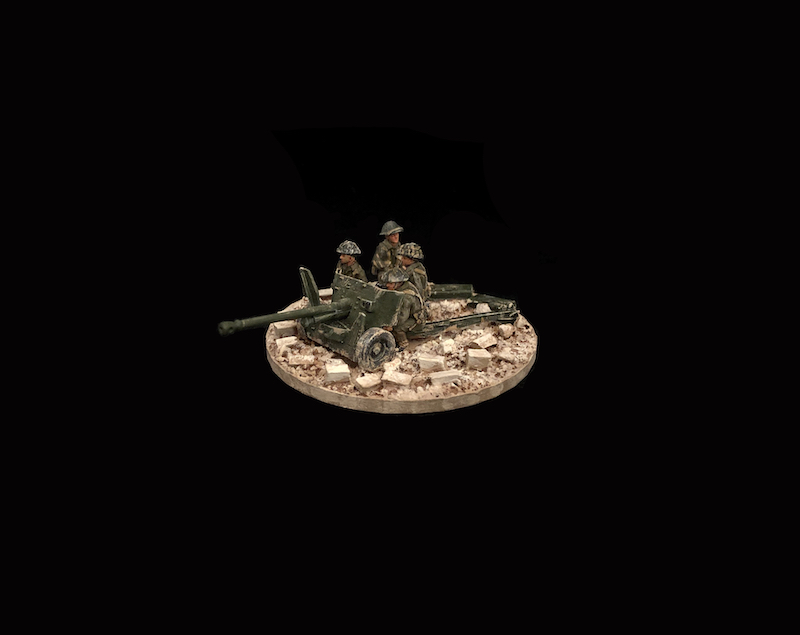
Canadian 6 pounder with Sniper Team

Gosh, I've had these minis primed, waiting on pill containers, for years! Time to get them done up.

Being easily entertained, I often collect and paint stuff inspired from books, movies or graphic novels. So this group of miniatures follows suit. 

I sought out these models after reading Mark Zuehlke's 'Ortona', which provides a great history of the 'Little Stalingrad' Canadians fought in order to take the Italian coastal town of Ortona in December, 1943.

The house-to-house fighting experienced in Ortona was so fierce that the Canadians brought forward their 6-pounder anti-tank guns to help reduce Fallshirmjager strong-points. The guns were positioned in a flanking position on the town's pier and coastal mole, allowing them to have a clear line-of-sight to enemy positions in Ortona. 

A 6-Pounder in action in Ortona, December 1943


The downside to this was that, with very little cover, the gun's crews were terribly exposed to German artillery fire. The Canadian gunners found that they had to scamper from their 6-pounders as enemy shells whistled in, and then dash back to quickly re-lay their guns and fire off a few shots before, once again, running back for cover.


Into this story comes Private Howard Mabley.  A country boy from Peace River, Alberta. Mabley was one of those recruits who, no matter how hard his drill instructors tried, could not learn the fundamentals of being an infantryman. It wasn't that he was disrespectful, he just couldn't retain the skills. Finally his officers gave up in frustration and sent Mabley to the regiment's kitchens to help there. 

So it came somewhat as a surprise that an officer found Mabley, under fire, happily loading one of the anti-tank guns. The officer upbraided the sergeant commanding the gun for having a cook there, but was told that Mabley could not be deterred, desperately wanting to help his mates in the fighting. The gunner went on to say that he never saw loading done so quickly and without mishap. 'Eight hundred rounds when through that gun and every shell was loaded by Mabley.' He served as loader for the rest of the battle, permanently loosing his hearing from the firing of the gun. 

These are 20mm figures from AB Miniatures. All of them, exquisite castings. The 6-pounder is from Empress Miniatures and fits perfectly with the gunners. 

As an interesting side-note, the Canadian version of the 6-pounder had it's gun manufactured in Longueuil, Quebec, whereas the carriages were made right here in Regina, Saskatchewan.

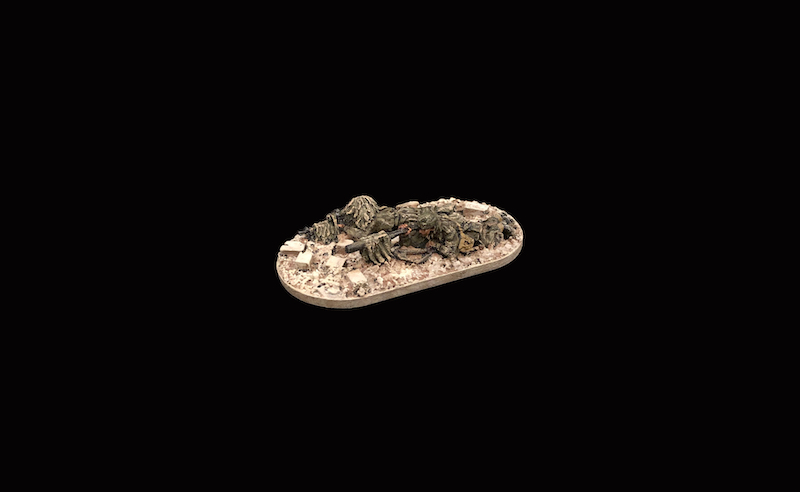
Finally, to finish off, I'm including a prone Canadian sniper team, searching for targets in the rubble. 

Another set from AB. Not as crisply realized as their usual fair, but still more than serviceable.


- Curt

Sunday, September 24, 2017

Worst Case Scenario #15: A Pint-Sized Campaign for the Battle of Ortona


A few years ago I painted up a force of WWII Canadian infantry and a troop of Sherman tanks with the idea of staging a game set around the 1943 Battle of Ortona - 'Canada's Little Stalingrad'.  

I've enjoyed reading JohnM's posts recounting his group's playing of several Normandy-based campaigns using the Too Fat Lardies ladder system. So, suitably inspired, I thought I'd give it a try by creating a series of interlinked scenarios based on the historical actions leading up to and including the battle for the Italian coastal town. 

'Reinforcements Moving up in the Ortona Salient' by Lawren Philips Harris

In the Lardies' campaign system, 'At the Sharp End', players typically take on the role of opposing platoon commanders, whose abilities and 'character' are reflected by their success (or lack thereof) on the tabletop. Due to the fact that several battalions were involved on both sides during the struggle for Ortona, there would be no distinct individuals to give a continuous personal narrative to the campaign, so I decided to have the results of each engagement affect the tactical makeup/character of the subsequent scenarios, thereby (hopefully) creating an overarching story narrative. Here are the four stages, or chapters, which make up our pint-sized campaign:

  1. Castle Sterlin / Casa Berardi on the Moro River Line
  2. Outskirts of Ortona
  3. 48th Highlanders Attempt the Flank on Cemetery Ridge
  4. The Final Push to the Castello


Map showing all four themed mission areas.

Map detail of the Ortona missions.

Scenario #1: Castle Sterlin and Casa Berardi

Background

The first engagement of the campaign, and the subject of this AAR, is based on the assault on the defences of the Moro River line, a few miles south of Ortona. These were held by men of the 90th Panzergrenadier Division, a polyglot formation made up of sweepings from the North African and Sicilian campaigns. So while they were all hardened veterans, it was a force that was largely worn-out, exhausted and on the brink of dissolution. Nonetheless, the German corps commander in this sector hoped to bleed the Canadians with the 90th while trying to avoid the early commitment of his crack Fallshirmjaegers to the battle. He wanted the parachutists held for the struggle for Ortona.


Arrayed against the Germans on the south bank of the Moro River were three brigades of the 1st Canadian Division. This was a relatively fresh, but largely untested force. While some battalions saw action in Sicily, others were quite limited in their combat experience. This was an army made up of the sons of those who gained fame at Vimy Ridge, Passchendaele and the Hundred Days, in fact many of the older officers saw action in many of those battles, and so the Canadians of the 1st Division wished to prove that they were made of the same mettle as their forefathers.

This scenario is a composite of two closely related actions which occurred during the Moro operation, both involving the taking and subsequent defence of two strategically situated farmhouses: 'Sterlin Castle' and 'Casa Berardi'.


___________________________________________


'Sterlin Castle' took its name from the leader of its defenders, Lt. Mitch Sterlin of the Royal Canadian Regiment (RCR). 

On December 10th, 'Sterlin Castle' was a front-position outpost to the main RCR positions. With riflemen at the doors and windows, Lt. Sterlin positioned the platoon's Bren guns in weapons pits outside the structure. The firefight that ensued was ferocious. The enemy attack finally exhausted their ammunition and the light machine gunners escaped in the direction of the river, leaving eleven men of No. 16 Platoon remaining inside the house. 

'Sterlin Castle' as it exists today.
Six remaining German machine guns targeted the structure, and in mid-afternoon, the Germans assaulted the building once again. Enemy dead were stacked up against the walls, with one officer killed in the act of trying to force a grenade into a window and another just four feet away trying to give cover fire. Artillery concentrations called down around the house killed thirty Germans. An hour later, Sterlin was able to pull out with the survivors to rejoin the Hastings regiment. Lieutenant Mitch Sterlin was subsequently killed in the fighting for Ortona, and given a posthumous Mention in Dispatches.


_______________________________________________


The second action, fought on the 14th of December, saw  Cpt. Paul Triquet of the Royal 22e of Quebec City, known as the 'Van Doos' (an anglicized pronunciation of the French for '22') take and hold a stone house called Casa Berardi.

By late in a day of brutal fighting, Triquet was the sole surviving officer of his battalion's assault force. He reorganized the remnants of his units into two platoons under the two remaining sergeants, and spurred them forward. "There are enemy in front of us, behind us and on our flanks," he warned. "There is only one safe place, that is on the objective." 

Casa Berardi then and now.

The attacks continued. Ammunition was short; there was none following, and no one who could be sent for it. The wounded were treated hurriedly, and left where they had fallen. A Mark IV approaching along the road was first blinded by smoke laid down by a supporting Sherman, and then destroyed by tank fire through the smoke. In the late afternoon Casa Berardi was finally taken by the Van Doos, and the indomitable few fought on almost to the crossroads. Finally the enemy's mortar fire stopped them, and the survivors, less than fifteen, drew back to the big house. A count revealed five Bren guns and five Thompson submachine guns on hand, and a woefully small supply of ammunition. "C" Squadron had four tanks left. With these slender resources Triquet organized his defences against counter-attack, and issued the order, "Ils ne passeront pas!" (They shall not pass!) The small force held out until reinforced during the early hours of the 15th.

Captain Triquet was awarded the Victoria Cross for his actions that day. 


_______________________________________


The Terrain

So with these two actions in mind I decided to combine them thematically into one scenario.

Positioned near the center of the tabletop is a large Italian farmhouse (The Casa) set alongside a crossroads. The Casa is ringed by several smaller structures, all of which have been shattered by recent artillery strikes. Large shellholes offer some options for defensive emplacements, or as launch points for assaults. The roads are lined with low stone walls, often broken in places. A small vineyard, gone to winter fallow, is behind the farmhouse. All of the ground except for the roads and buildings/ruins is to be considered extremely boggy from the seemingly continuous winter rain. Any vehicle will have a very high chance of becoming bogged down if it tries to maneuver in this morass (any doubles rolled on 3 dice).

Here is a map of the scenario. My apologies for the awkward hand-drawn attempt, but after a long day parked in front of a computer monitor I take inordinate pleasure in the simple fun of sketching and colouring maps for our games.


The map of Scenario #1: Casa Berardi / Sterlin Castle

The Combatants  


The Germans start with a small screening force (one section, or two teams) in or near the farmhouse. 


The remainder of their force sits waiting off-table, poised for a counterattack. It is composed of a panzergrenadier kampfgruppe made up of two reduced infantry platoons (each commanded by a Senior Leader) along with some armour support in the form of a Mk IV, a StuG and a Hetzer. This counterattacking force will be made available once the German players(s) expend a 'filled' a Chain of Command die (ie. accrued 6 Chain of Command points). The Germans are veterans, but always add a +1 to their 'Bad Things Happen' checks to reflect their combat exhaustion.

The Canadians will launch their assault from the south edge (bottom of the map following) with their entire force. 

It is composed of a full strength infantry platoon, an artillery observer from a 3" battery, and a reduced squadron of three Shermans from The Ontario Regiment (they have their own Level III armour leader). The Canadians are considered Average, but are Aggressive in close combat.

Victory Conditions

The Canadians will need to quickly neutralize the German screening force and take up positions in and around the Casa before the German counterattack falls upon them. They need to hold the position until reinforced later in the day (ie. when four turns have passed), or by breaking the German counterattack. Either of these two events will mark the end of the battle.

The Germans need to hammer the Canadians as hard as they can as they are playing for time and blood. If they can break the Canadians they will buy valuable time for their Fallshirmjaeger comrades in their defensive preparations in Ortona. Also, any allied armour kills will carry forward to affect future availability of Sherman reinforcements for the Canadians.


Our Replay

In the patrol phase the Germans (Stacy) occupied the Casa with one section of panzergrenadiers in the upper floors. 


The Canadian infantry (Peter) advanced on a broad front with one section straight up the central road while the two others took to coming up the right flank. The Shermans (Jeremy) began with one tank on the road while the other two took the calculated risk of maneuvering in the boggy ground near the center. (They later became bogged and were immobilized for the rest of the game but served as gun bunkers for support.) 


The three allied tanks opened fire on the upper floor of the Casa, ultimately bringing down its roof. The Germans squad, minus a few casualties, were forced to scramble down to the second level to relocate their defensive position there. The Canadian infantry, under the protection of the tanks' fire, advanced towards the farmhouse, taking some desultory return fire from the pinned down Germans. 


As the Canadians closed in for the kill, the German player (Stacy) decided that caution was the better part of valour and it would be best to pull out his chewed-up German squad to defend the jump-off point positioned just behind the house. At this point it was looking pretty bad for the Germans as Stacy had very few Chain of Command points saved up for the counterattack and Peter and Jeremy were pushing hard.

But lady luck pitched the scales to the Panzergrenadiers' favour in a big way, when, just as the Canadians were about to storm the Casa, Stacy rolled four 6's allowing him to immediately bring in his counterattacking forces and maintain the initiative.

A fresh Panzergrenadier squad leapt from the jump-off point and stormed into the Casa, while a Mark IV panzer and a Hetzer rolled down the road towards the Casa to challenge the single Sherman that had not bogged down. The tables had been turned and the Canadians were caught on their back foot. It was a brand new game now, and the tension was ratcheting up!


Mark IV and Hetzer coming up the road to face off with the Shermans...

With his dander up, Peter decided to grasp the nettle and storm the Casa to clear it of enemy forces. The ensuing close combat turned to be bit of a rude shock as the Germans benefitted heavily from being in a good defensive position. The Canadians suffered heavy casualties and were bundled out of the Casa to regroup down the road, tending to their wounded. The Germans, while bloodied, maintained their firm hold on the building.


The remnants of the Canadian section regroup behind a Sherman bogged amongst the ruins of a house.
Nearby, on the flank, the Canadians were being hard pressed by a heavy German counterattack, supported by a tripod deployed MG42 and the not too distant panzers. Peter decided to take another risk by having his Forward Observer request a barrage just in front of the Canadian lines. Without the benefit of spotting rounds to allow correction this could have gone very, very badly - definitely a 'Danger Close' moment.  


Canadian Forward Observer team: MVP award for the game.

But the winds of fate turned again with the barrage landing right on target, pinning most of the panzergrenadier force and causing several casualties amongst the entire kampfgruppe. Artillery barrages are particularly nasty in Chain of Command as they can last numerous play rounds, causing havoc and pinning down troops, which this one did for the entire remainder of the game, pounding the German lines, whittling away at their squads bit-by-bit.

Next, Jeremy's only unimobilized Sherman edged forward down the road and sent a armour piercing round ricocheting off the Mark IV's armour, shocking it's crew. The two tanks would exchange three volleys before the Sherman gunner 'got in his eye' and knocked out the panzer. 


The Sherman nudges forward to take a shot at the Mark IV.
The Mark IV is knocked out and the remainder of the German counterattack begins to falter.

Scenario #1 Conclusion

At this point nightfall had arrived and the fighting ebbed. I declared the scenario to be a draw, but not entirely inconclusive - both sides had met some of their goals, while failing to achieve others. 

So, how would the scenario's results affect the next game in the campaign?  Well, due to the time bought by Stacy's skillful defence of the Casa, the Fallshirmjaegers will benefit from some additional defensive benefits in 'The Outskirts of Ortona' mission.  But in turn, the 90th Panzergrenadiers would no longer play any supporting role in the campaign as the Battle for the Moro had crippled it as a fighting force.

We'll move onto the second chapter in a few weeks and I'll try to keep a log of our progress.


Next: A sally mission in Renaissance Italy.


Tuesday, January 13, 2015

20mm WWII Canadian Infantry at Ortona (Part III)


Several months ago I started a project to collect and paint the forces which were involved in the 1943 Battle for Ortona. To most, this battle, if known at all, is regarded as nothing but a tiny sideshow within the larger Italian campaign, but for Canada it is our ‘little Stalingrad’, the battle that brought us out from the shadow of Dieppe and re-established our reputation as a battle-winning partner of the Allied 'family'.


The struggle for Ortona was known for its vicious, grinding and intense urban combat. Fighting which the Canadians earned a hard-earned reputation for effective house-clearing during those last weeks of 1943. Their opponents were tough veteran Fallshirmjaegers from the 1st Parachute Division and as such the fighting was ferocious, often with no quarter given or received. In the end the Canadians drove the German paratroopers from the town but at a fearsome cost. Almost 1,400 men from the Canadian 1st Division (the Loyal Edmonton Regiment, Seaforth Highlanders and the Three Rivers Regiment specifically in Ortona) lost their lives during this campaign.


The models you see here are 20mm castings from AB Miniatures. These figures are, in my opinion, the best models available for this period, in this scale (and arguably most 28mm ranges as well). They are quite lanky and have a wonderful sense of animation. Many of the figures do a great job in telling a story by how they're posed. For example, I love the figure of the soldier about to throw a grenade. He is leaning back, probably meant to have his back against a wall, finger-to-pin, waiting for the signal from his section to throw his Mills bomb into an enemy-held room. There is also a figure of a rifleman on his knees firing up to an upper story. You get a sense that he has just come up from a prone position to get a quick shot before dropping back to cover again. Amazing sculpting in any scale.

This is the last section of my Canadian platoon, which also has the command team and some special weapons teams. (The other two sections, and a bit more background, can be seen here and here.)

Okay, in more detail, we have:

The Command Team, made up of the CO accompanied by his radioman, his senior sergeant waving the boys forward and a corporal charging forward with Sten SMG at the ready (the presence of the Stens are a bit anachronistic as the Canadians typically hated them and exchanged them for Thompsons at every  opportunity). The base shapes is what I use for all my skirmish gaming. Hexes for officers, squares for NCOs, rounds for troopers, octagons for special weapons, oblongs for weapon teams.


Next is an artillery Forward Observer with his radioman. Along the Moro River and in Ortona the Fallshirmjaegers specifically targeted Canadian radio operators and the brigade went through an appalling number during the month's fighting.


Here are the dogface infantry. Nothing too sexy, just the trusty SMLE rifle, loads of ammunition and a bunch of grenades. As I mentioned previously there is some brilliant animation here, specifically with the man with the grenade and the kneeling rifleman. 


Finally, here is an assortment of heavy weapon teams. 


First up a set of PIAT teams. One pair legging it and the other deployed prone for firing. The Candadians reportedly loved the PIAT and even used the weapon for 'mouseholing' during their house-to-house fighting (something that sounds suicidally dangerous to me, but I suppose when the situation demands...). 


The next duo is a 2" mortar team. From what I understand they used these to try to mask the movement of men clambering through the rubble-filled streets. 


Concluding the special weapons is this Bren gun team. I like the third man hollering back telling others from the section to bring up some more ammunition.


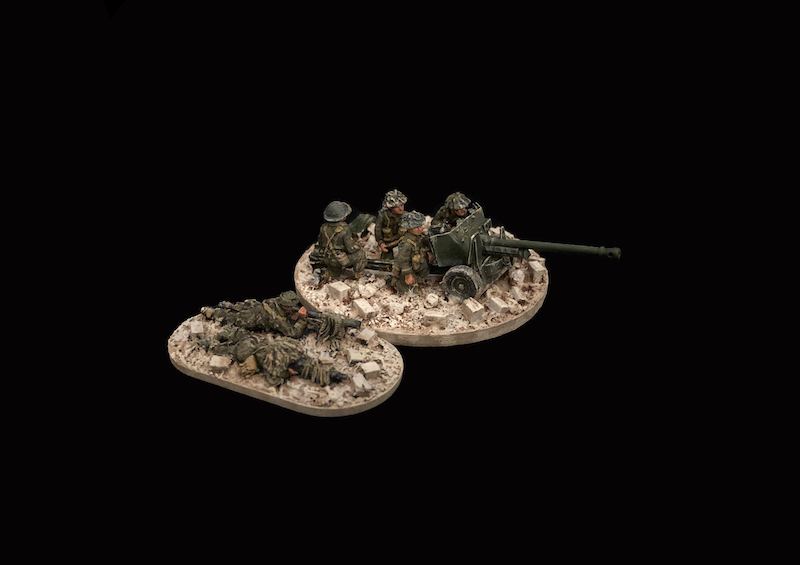
Another debut in this post are three MDF buildings, the designs of which I had commissioned from Byron at SG2 Creations (who, I must add, is also one of our generous prize sponsors for the Challenge). The need for region-specific buildings came about when I noticed that there were not many retailers who were providing buildings for the Italian campaign in 20mm. Byron and I poured over period photographs of the buildings at Ortona and have come up with a base ‘recipe’ to represent the narrow multi-story structures that were typical to the town. 


MDF buildings are great but one thing that they have a hard time at conveying is the wonderful bodged randomness of older architecture. We all know that any pre-20th century building is a conceit to straight walls and level floors. As such I decided to roughen up the flat, perfect face of these buildings by giving them a rough skim coat of Liquitex gel medium. Once dry, I drybrushed them in khaki and tan to give them that quasi-Mediterranean look.

While the stucco is a bit dour, Ortona was (and still is) a vibrant seaside resort town and so I thought I’d paint the shutters and doors in somewhat brighter, more festive colours. I used thinned-down ink to give them bit of a sun-bleached, care-worn look. (I have to apologize for the roofs as I haven't figured out how I want to replicate the tile. In the meantime I've just painted them a reddish terracotta so they don't look so 'MDF-ish'.)


These three buildings are separate structures so they can be swapped around, but I’m also having Byron make up some 3 and 4-unit row house sections that will have common walls but irregular roofs and facades. We’re also doing a bunch of wrecked structures (as, sadly, most of Ortona was destroyed) that will use these structures as a basic template. It should provide for a tabletop that is thematically closer to the actual location. I have a couple ideas for special one-off buildings that were notable during the campaign but I’ll post on that when things get more clear on how they're coming along.

Of course, if you're looking for an excellent and economical set of Italian Campaign buildings you now know Byron is the man to talk to. :)

Thanks for visiting folks!
Tuesday, October 7, 2014

20mm WWII Canadian Infantry from AB Miniatures - The Battle for Ortona, 1943 (Part II)


This post is a continuation of one from a few weeks ago where I showed my first efforts depicting Canadian infantry during their 1943 assault on Ortona, Italy.

As with the original group, this squad is made up of ten 20mm figures from AB Miniatures, which can now be sourced through Eureka Miniatures. 

The Bren team along with the section leader who is armed with a Sten. Interestingly, from what I've gathered, the Canadians seemed to have loathed the Sten and usually swapped them out for Thompsons whenever they had the chance.

I can't recommend this range enough. I would, without hesitation, put them up against the best that 28mm has to offer. They have such wonderful, natural poses and their physiques are slim, almost gaunt, which from looking at contemporary photographs, seems to fit the period very well.

A rare colour print of a Canadian soldier in Med. summer uniform. Wonderfully lean and scruffy. They changed back to their heavier wool gear during December's Moro River campaign which culminated in the Battle for Ortona. 

The current marketplace for WWII gaming seems more or less dominated by either 15mm or 28mm miniatures. I find this interesting as it was only about ten or so years ago that 20mm figures were regarded as the uncontested scale-of-choice in this period. Frankly, to my way of thinking, the dominance of 20mm made perfect sense for wargaming (and still does) as there is an bewildering number of inexpensive plastic kits, die cast toys and railway stuff in 1:76 / 1:72  / 1:87 scale.


A case in point is this 'knocked out' Hetzer that I've included with this group of figures. This is an old 1:72 scale Esci kit (cheap as borscht) which I assembled and painted over an evening about 15 years ago. While a bit long in the tooth, I think it's aged relatively well (like it's owner ;)) and fits in perfectly with 20mm figures.


To me, 20mm is the ideal accommodation between the detail of 28mm and the sense of ground scale that 15mm affords. Don't get me wrong, I like every one of these scales and I collect WWII in all of them, including 6mm (yes, I'm a bit touched), but I have to say that I have a soft spot for 20mm. It gives the painter something large enough to work with, provides a nice sense of scale on the tabletop and it allows a gamer to amass a sizeable collection of miniatures and terrain without having to sell an organ to acquire and store the stuff.

The charming Italian building in the background is by Frederick C, a fellow Conscript from the Fawcett Ave gang.
In a week or so I'll post the last section from this platoon, along with it's HQ and some supports.

Next Up: Gladiators or Pulp Adventurers - not sure which yet...

Wednesday, September 24, 2014

20mm WWII Canadian Infantry from AB Miniatures - The Battle for Ortona, 1943 (Part I)


About a year ago I was rummaging around my storage shed and came across a collection of 20mm WWII figures that I had originally painted-up for use with Arty Conliffe's Crossfire (a very fine and innovative set of rules btw). This group of figures primarily composed of old, but quite good SHQ, Britannia and FAA models. This discovery began me thinking of how I could make use of these figures for future gaming. I decided that I could conscript my 15mm Flames of War collection (a set of rules I'm not especially fond of) for use with Crossfire and then I could use these venerable 20mm figures for skirmish gaming (Chain of Command, Bolt Action, etc). As I sorted through the lot I discovered that  I had scads of German Fallshirmjaegers (from a previous Crete scenario), but I needed some more Commonwealth figures to serve as opponents. 

So, I began snooping around the web and came across Anthony Barton's (of AB Miniatures) superb 20mm WWII range. So credit card was duly unsheathed and an order placed. Nonetheless, as these things frequently go, by the time the figures arrived I had abstractedly wandered off to another project (I know, how typical) so the castings were studiously unpacked, briefly admired and then stored away awaiting further inspiration.

Canadian armour moving through Ortona by Charles Comfort
The spark came a few weeks ago when I began reading about the 1943 battle of Ortona which occurred during the Italian campaign. In the larger scheme of things this battle was largely a sideshow, dwarfed by the campaigns in the Eastern Front and overshadowed by the impending landings in Normandy, but to many in Canada Ortona is regarded as our own 'little Stalingrad' due to its brutal and unrelenting house-to-house combat.

'Reinforcements Moving up in the Ortona Salient' by Lawren Philips Harris
As a brief background, Ortona is a port town situated on the Adriatic coast of Italy, relatively close to Rome along a east-west axis. In 1943, with the Allies lines of supply stretched to the extreme, Ortona was regarded as strategically important as it possessed one of the few ports which could accommodate deep-draught shipping. 


For this reason Montgomery wanted it taken and so General Christopher Vokes, commander of the Canadian 1st Infantry Division, ordered his men to batter their way into the town through a series costly frontal assaults along its approaches. Vokes wasn't necessarily a bad commander, but he really wasn't very good either. Monty regarded him as 'a plain cook' and I think that assessment is fairly accurate. So instead of bypassing the town and threatening to pocket the Fallshirmjaegers garrisoning it, Vokes decided to take Ortona by direct assault. 

Map of Ortona showing the path of the Canadian assaults.
The Germans had positioned themselves very well, establishing interlinking fields of fire for effective ambushes, and had littered the advance with mines and boobytraps. The Canadians found that attacking over the rubble-heaped streets while under enemy fire was extremely gruelling and so the casualty toll rose.  The Canadians realized that they had to develop other means in order to grind ahead or the attack would stall completely. One notable trick they came up with was the tactic of 'mouse-holing' (also used in the fighting at Stalingrad). This involved the Canadians blowing a hole through the adjoining walls between upper floors and then systematically working their way down. While this tactic was effective in keeping the men out of the fire-swept streets, the process was fraught with danger as the advance from room-to-room often involved ferocious close-quarters combat.


Over eight days, from December 20th to the 28th, the Canadians of the 2nd Brigade forced the German paratroopers out of the town, but at a cost of nearly 2400 in dead and wounded. The Moro River campaign (of which Ortona was a part) inflicted almost a quarter of all casualties suffered by the Canadians during the entire Italian campaign. After reading the accounts of the campaign one can appreciate why the term 'D-Day Dodgers' deeply rankled with the men fighting up the Italian peninsula.


I painted these figures to represent men from the Loyal Edmonton Regiment and the Saskatoon Light Infantry which were two of the four infantry battalions which were committed to the battle (the other two units were the Seaforth Highlanders and the Princess Patricia Canadian Light Infantry). 


I was struck by the photos of the incredible amount of pale/white rubble in Ortona so I tried to replicate the same in my groundwork, with lots of shattered masonry, dust and debris scattered about.


I've pretty much completed a full platoon, with various supports, but I thought I'd show them over two or three blog posts so the sculpts can stand on their own and not be lost within a mass of figures. 


These castings were a real pleasure to work on and I hope you enjoyed looking them over. 

Next: To mix things up, some Post Apocalyptic Raiders!